Add archiving option to archive records
Beginner
V15.0
V 15.0
A lot of the default models in Odoo have the ability to archive records. This is a common feature that is used in Odoo and you'll most likely want (or need) to have this option on your own model too. Imagine that you have some contacts in your database but they left your company and you no longer want these contacts to show up in your searches. Thanks to the archive option they will no longer be shown but you're still able to activate the record(s) if you'd need them back!
In this tutorial you will learn how to add the archive option to your own model or an existing model. In this example we'll create a new model named 'contact.category' and we will add the option to archive contact categories from the form view.
The first thing that we need is a model. Let's create a model named 'contact.category' and let us create the minimum amount of fields we need. We'll want a name (category) for the record and a boolean field that allows us to keep track off if the record is archived or not:
# -*- coding: utf-8 -*-from odoo import models, fields, apiclass ContactCategory(models.Model): _name = 'contact.category' name = fields.Char(string='Category name', required=True) active = fields.Boolean(string='Active', default=True) By default we set the boolean to 'True' so that any new created record is automatically active. Odoo itself always uses the name 'active' for the field with archiving options. It is a bit of an unwritten rule but for consistency we should follow it. The next step is to create a tree, search and form view for our model.
Let us start by creating a new XML file named 'contact_category_view.xml' in the 'views' folder of your custom addon. In this file we'll create our three views. Let's start with the search view and tree view which are the easiest:
The next step is to create our form view. The archive option in Odoo uses the widget "web_ribbon" in combination with a color and is set invisible if the record is not archived. Under this widget the 'active' field should be added but made invisible so Odoo can check the state of your current record. Have a look at the code first:
So do you notice anything interesting? Due to the widget="web_ribbon" with the text "Archived" it will show "Archived" as text if the current record it not active. The field 'active' is added on the form but hidden so that Odoo can evaluate the domain (attrs) to only show the ribbon when the record is archived.
Alright, we're nearly done! The last step is to create a menuitem and an action to open the tree/form view. In this tutorial I'll create a new menuitem named "Contact categories" under the contacts app and an action to open the categories. You can just change this example.
The first step is to create an action. The action will make sure that if you click on the menuitem that it will open up our tree view:
Now let us add a menuitem which calls our just created action so that Odoo knows which view(s) to load:
Great job, the hardest part is done now! As we've created the model, the view and the logic to archive records it is now time to create a security rule. Now add a security rule in 'ir.model.access.csv' to be able to access the view and create records in it. Let's create a simple security rule that gives all users full rights on the model:
id,name,model_id:id,group_id:id,perm_read,perm_write,perm_create,perm_unlinkaccess_contact_category,contact.category.example,model_contact_category,base.group_user,1,1,1,1 That's it! If you now install this module you'll have a new menuitem "Contact categories" and you can archive or activate records from the form view: 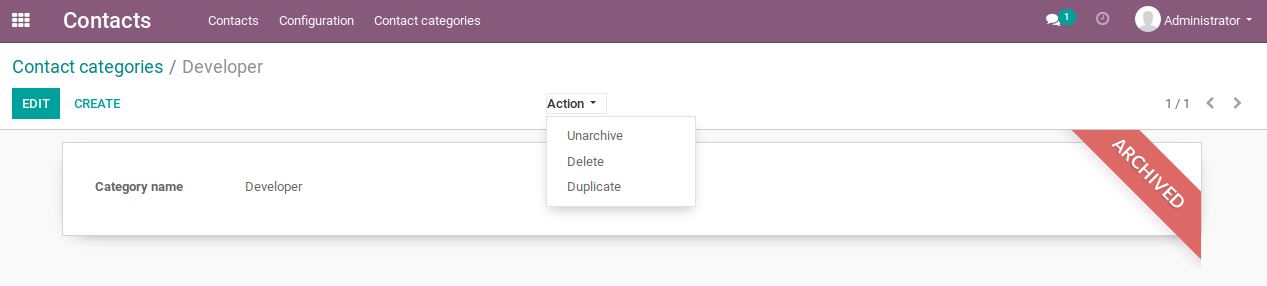
So how exactly does the archive option work? Once a record is archived it will not show up on any searches you make in the backend anymore. The Odoo framework filters them out by default. You can only see records once they're activated again. If you want to find an archived record you can add a search condition in your tree view by searching on "Active is False".
Adding the option to (un)archive records in Odoo is very easy to add and allows you to filter out no longer needed records out of the box. The archive option is often used in Odoo and if you have a model where data gets outdated at some point you'll most likely need it. You'll only need two things to add the archive option: a boolean field and the field being shown on the form view within a button with the name "toggle_active".